

Painting a cargo trailer is not only a way to enhance its aesthetic appeal but also a crucial step in protecting it from the elements and extending its lifespan. As a cargo trailer supplier, I've witnessed firsthand the impact of a well - painted trailer on both functionality and marketability. In this blog, I'll guide you through the process of painting a cargo trailer, from preparation to the final touches.
Why Paint Your Cargo Trailer?
Before diving into the painting process, it's essential to understand why painting your cargo trailer is so important. Firstly, a fresh coat of paint acts as a protective barrier against rust, corrosion, and UV rays. Cargo trailers are often exposed to harsh weather conditions, road salt, and other environmental factors that can cause damage over time. A good paint job can significantly slow down this deterioration process.
Secondly, painting can improve the trailer's appearance. Whether you're using the trailer for business or personal use, a well - painted trailer looks more professional and can even increase its resale value. For businesses, a branded and neatly painted trailer can also serve as a mobile advertising platform, helping to promote your brand wherever the trailer goes.
Step 1: Gather Your Materials
The first step in painting a cargo trailer is to gather all the necessary materials. Here's a list of what you'll need:
- Sandpaper: Various grits, including coarse (80 - 120 grit) for initial surface preparation and fine (220 - 320 grit) for smoothing the surface before painting.
- Primer: Choose a high - quality primer that is suitable for the material of your trailer (usually metal or fiberglass). The primer helps the paint adhere better and provides an extra layer of protection.
- Paint: Select a paint that is durable, weather - resistant, and suitable for the intended use of the trailer. You can choose from enamel, acrylic, or urethane paints, depending on your preferences and budget.
- Paintbrushes and Rollers: Different sizes of brushes for detailed work and rollers for larger areas.
- Masking Tape and Plastic Sheeting: To protect areas that you don't want to paint, such as windows, lights, and decals.
- Safety Equipment: Gloves, goggles, and a respirator to protect yourself from paint fumes and debris.
- Cleaning Supplies: Soap, water, and a pressure washer or hose for cleaning the trailer surface.
Step 2: Prepare the Trailer Surface
Proper surface preparation is the key to a successful paint job. Start by cleaning the trailer thoroughly to remove dirt, grease, and any loose paint. You can use a pressure washer or a hose with a strong stream of water, along with a mild detergent. Make sure to rinse the trailer well and let it dry completely.
Next, use sandpaper to sand the entire surface of the trailer. Start with a coarse grit sandpaper to remove any rust, old paint, or rough spots. Then, switch to a finer grit sandpaper to smooth the surface. This will help the primer and paint adhere better. After sanding, use a clean cloth or a vacuum to remove all the dust from the surface.
Step 3: Mask Off Areas
Use masking tape and plastic sheeting to protect areas that you don't want to paint. This includes windows, lights, door handles, and any existing decals. Make sure to apply the masking tape neatly and press it firmly to prevent paint from seeping under.
Step 4: Apply the Primer
Once the trailer surface is clean and dry, it's time to apply the primer. Stir the primer thoroughly before using it. You can apply the primer with a paintbrush or a roller, depending on the size of the area. Start with the edges and corners, using a brush for more precise application. Then, use a roller to cover the larger areas. Apply the primer evenly, making sure to cover the entire surface. Let the primer dry according to the manufacturer's instructions, which usually takes a few hours to a day.
Step 5: Sand the Primed Surface
After the primer has dried, use fine - grit sandpaper to lightly sand the primed surface. This will smooth out any bumps or unevenness and help the paint adhere better. Wipe away the dust with a clean cloth or a vacuum.

Step 6: Apply the Paint
Now it's time to apply the paint. Stir the paint thoroughly before use. Similar to applying the primer, start with the edges and corners using a brush. Then, use a roller to cover the larger areas. Apply the paint in thin, even coats, allowing each coat to dry completely before applying the next one. The number of coats required depends on the type of paint and the desired finish, but usually, two to three coats are sufficient.
Step 7: Add Finishing Touches
Once the paint has dried completely, remove the masking tape and plastic sheeting. Check the painted surface for any drips, runs, or uneven areas. If necessary, you can sand these areas lightly and apply another thin coat of paint. You can also add any decals or graphics to the trailer at this stage.
Different Types of Cargo Trailers and Their Painting Considerations
As a cargo trailer supplier, we offer a variety of cargo trailers, each with its own unique painting requirements.
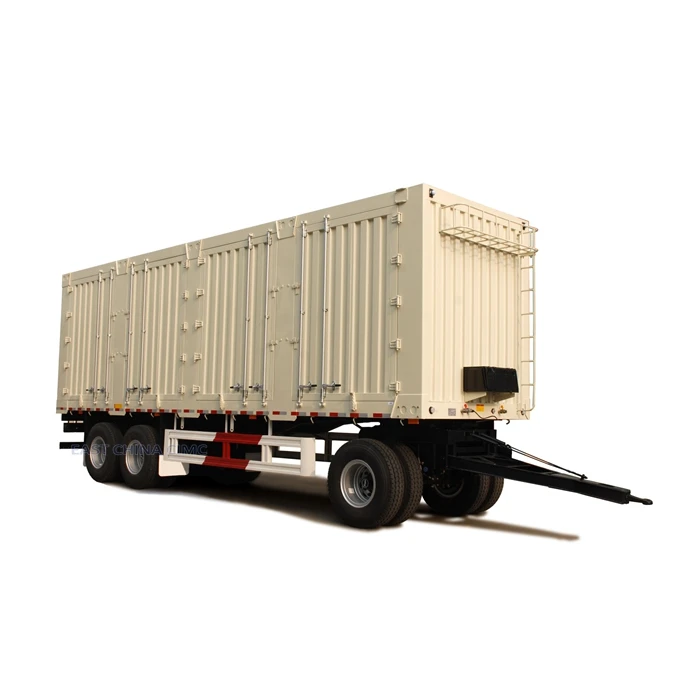
- Drawbar Trailer Dolly Trailer: These trailers are often used for short - distance transportation and are exposed to a lot of movement and vibration. When painting a drawbar trailer dolly trailer, it's important to choose a paint that is flexible and can withstand the stress of movement without cracking or peeling.
- Slide Curtain Semi Trailer: Slide curtain semi - trailers have a large, flat surface area, which makes them ideal for advertising. When painting a slide curtain semi - trailer, you can consider using high - quality, fade - resistant paint to ensure that any graphics or branding on the trailer remain vibrant for a long time.
- Livestock Semi Trailer: Livestock semi - trailers need to be painted with a non - toxic, easy - to - clean paint. Since these trailers are used to transport animals, the paint should not release any harmful chemicals that could affect the health of the livestock.
Conclusion
Painting a cargo trailer is a rewarding project that can improve its appearance and protect it from damage. By following the steps outlined in this blog, you can achieve a professional - looking paint job. As a cargo trailer supplier, we are committed to providing you with high - quality trailers and the knowledge to maintain them. If you're interested in purchasing a cargo trailer or have any questions about the painting process, we encourage you to contact us for a procurement discussion.
References
- "Automotive Painting Techniques" by James Smith
- "Trailer Maintenance and Upkeep" published by Trailer Industry Association